
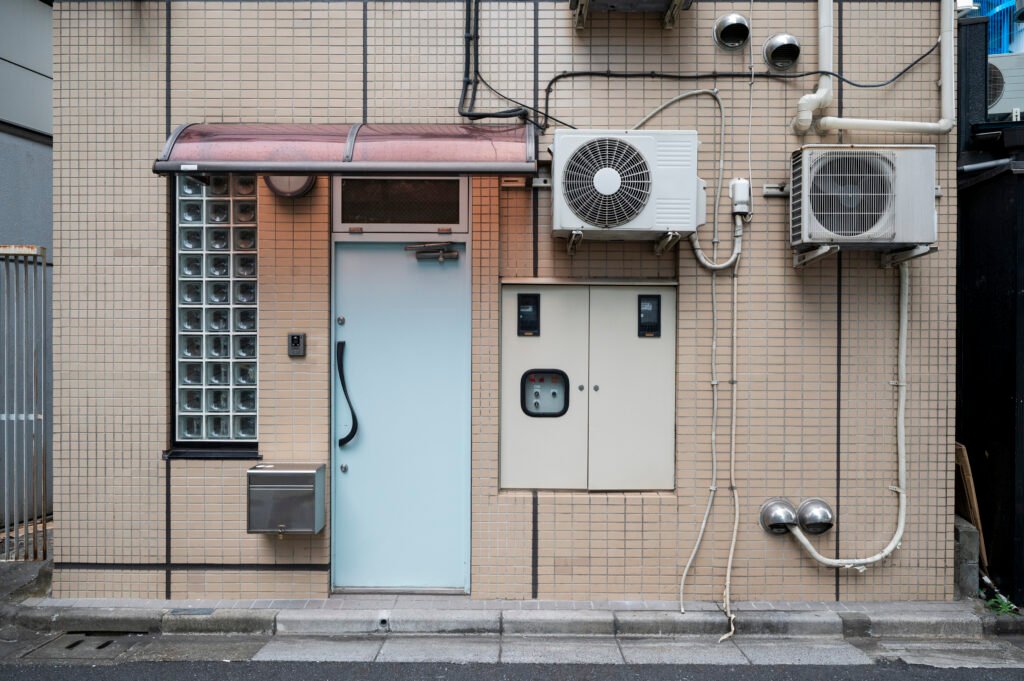
Ductless mini split systems offer incredible flexibility when it comes to installation options, which is why they are a popular choice for many homeowners. Unlike a bulky window unit, a properly installed mini split can be nearly invisible — see our mini split vs window AC guide for a full comparison. While it is most common for these indoor units to be installed on exterior walls for ease of installation and to ensure that any condensation is effectively evacuated outside, sometimes this isn’t possible due to architectural constraints, like large windows or design preferences.
In such cases, placing the unit on interior walls can be a feasible alternative. Though this setup might seem more involved and difficult compared to mounting on an exterior wall, it allows for a central location that can enhance airflow and provide more balanced climate control throughout the house.
With proper planning and by taking key considerations into account, installing a mini split on an interior wall can be a common and practical solution under the right circumstances, offering both convenience and regulated comfort.
Can Mini Split Lines Run Inside Walls?
However, when it’s done properly, this method can significantly improve the look of a space and have no negative impact on the performance of mini splits. Having installed many systems myself, I can say that, despite the potential challenges, running mini split lines in walls can make a home look dramatically better.
Key Factors for Successful Installation
Given below a key factors that should be considered for a successful installation
Outdoor Unit Line-Set
When setting up a mini split system, a line-set needs to run between the indoor and outdoor units. This can often be achieved by running the line-set inside the wall to reach the exterior where the outdoor unit is located. This method is commonly used during remodeling projects when the walls of a house are open and accessible. In some cases, it’s necessary to route the line-set internally until it is near the outdoor unit.
If internal routing isn’t an option, the line-set can be directed outside to the nearest exterior wall. A sleek cover can conceal both indoor and outdoor runs, ensuring an aesthetic appeal for the house.
Condensate Management
When installing a mini-split unit on an interior wall, it’s critical to consider condensate management. Managing the condensate produced by the AC during usage in summers is essential to prevent water damage. If the unit is positioned near an exterior wall, gravity can assist in draining the condensate outside. However, when it’s placed farther inside, natural drainage isn’t an option. In such cases, employing a pump to channel the condensate to a designated drainage area is vital. It’s also essential to strategize an adequate slope in the line-set if concealed within walls, ensuring efficient removal and compliance with local codes. This approach not only prevents unnoticed leaks but also maintains a clean and dry interior space. From my experience, understanding the positioning and handling of the line-set is key to a successful installation, especially when considering long-term maintenance and evacuating condensate properly.
If your home already has ducts, you may be able to skip wall routing altogether — using a mini split with existing ductwork is worth exploring.
Access for Line-Set Connections
Concealing the line-sets inside walls can give a clean, polished look, but it’s important to think ahead. When considering this setup, it’s wise to incorporate access panels at connection points. I’ve seen many installations where this precautionary measure was a lifesaver. If there’s ever a leak, having easy access to the connections without having to cut open the wall can save a lot of time and trouble.
It also eliminates the need to guess where the connections lie. Leaks can happen, and being prepared means you won’t have to scramble to discover the issue. A few well-placed panels can make all the difference in maintaining your system and avoiding messy repairs when issues arise. Trust me, the last thing you want is a hidden problem that turns into a bigger one.
Concealing the Refrigerant Lines with Slimduct SD
The best way to conceal the line-set of a ductless mini split system inside interior walls is by using Slimduct SD from Inaba Denko America. This small run solution is specifically designed for interior wall-mounted units, allowing you to hide the lines and match your interior design. With options like SP-77 Soffit Inlet and SWC-77 Flange, you can choose colors that compliment or match your home’s interior by painting the covers to blend in seamlessly.
How to Run Mini Split Lines in Walls?
I’ve seen in various construction projects—especially in high-rise residential buildings—that installing these systems behind the walls is becoming a trend. This trend is rooted in technology that’s been evolving for decades — read the history of mini split systems to see how far they’ve come. This approach involves placing the refrigerant lines, condensate drain, and wires of air conditioners discreetly inside the walls.
Doing this helps maintain a clean look since everything is hidden. When the lines are concealed, you only see the indoor and outdoor units after installation. From my experience, while this may require more planning during the installation phase, especially to ensure all components are correctly placed and accessible, it’s well worth the effort. Keeping the pipes inside the walls not only enhances the aesthetics but also protects the lines from damage.
There are 4 components involved in the concealment of mini split lines in walls as follow:
Insulated Copper Tubes
It’s crucial to properly insulate the copper tubes that transfer refrigerant between the indoor and outdoor units. Without proper insulation, condensation can occur inside the walls, causing potential damage. Proper insulation keeps the system efficient and protects your home from moisture issues.
Non-Insulated PVC Pipe
Using a thicker PVC pipe for the discharge of condensate water is effective because PVC pipes are robust and handle temperature changes without extra insulation. The wall acts as a barrier, preventing condensation since the water temperature isn’t as cold as the refrigerant, reducing the risk of moisture build-up or leaks.
PVC Cable
PVC cables are essential for transmitting power and signals to the mini-split indoor unit. The number of cables required depends on the specific system, but they all need protection within a PVC conduit.
PVC Conduit
PVC conduits serve to house and protect PVC cables, ensuring they remain undamaged and safe. Without this protective conduit, the cables are vulnerable to damage, raising safety concerns.
Procedure to Conceal Mini Split Lines in Walls
Here’s the step-by-step process we typically follow to hide the refrigerant lines, drain line, and wiring for wall-mounted mini splits:
Mark the Mini Split Position and Lines Route
When installing a mini split, it’s essential to place the unit around 7-8 ft above the floor and at least 8″ from the ceiling. Ensure you have a side clearance of 4″ and an 8″ clearance below the unit for proper air circulation. From personal experience, running the drain line down vertically is crucial to prevent issues.
Even if you think it’s okay to run it horizontally with a slope, you might not know where the pipe ends up once the wall is finished. For refrigerant lines and wires, I always run them vertically upward if the room has a ceiling to maintain a neat installation.
Measure the Length of Mini Split Lines
Cut the pipes and wires to the right length and check the entire route from the mini split indoor unit to the outdoor unit. Measure the refrigerant pipes and drain pipe to fit perfectly. This ensures the indoor and outdoor units connect smoothly, making the system more efficient.
Cut the Wall to Fit the Mini Split Drain Line
ensuring the drain line is properly positioned can be a bit challenging, but it’s absolutely essential for optimal performance. I’ve found that using a hand grinding machine to cut a narrow channel into the wall is an effective way to create a perfect fit for the mini split drain line.
This method allows the drain line to run inside the wall without any obstructions. Once the channel is created, I usually paste a few points of cement plaster along the drain line to hold it in place temporarily. This temporary fix helps to ensure everything stays put while I finish up the installation.
It’s important to ensure that the plaster is applied evenly and securely, as this will hold the drain line in place until more permanent plaster work is done. Working along the wall with the right tools and materials, like cement and plaster, makes the installation process smoother and more efficient.
Cut and Run the Mini Split Drain Line in the Floor
It’s sometimes necessary to cut a path for the drain line to run through the floor. To do this, I usually use a hacking machine to carefully create the required space. Once the line is in place, it’s important to conduct a flow test to ensure everything is working correctly.
I pour water into the inlet of the drain pipe to check for any leakages and to verify the smoothness of the water flow. This process helps me confirm that the installation is secure and efficient, preventing any potential issues down the line.
Cut the Wall to Fit the Mini Split Refrigerant Lines and Wires
One of the most important steps is to cut the wall to ensure that the refrigerant lines and wires can properly fit inside. It’s crucial to bundle these lines and wires neatly together to avoid any damage. To do this, make sure to include the drain line and wrap everything tightly with black tapes.
This helps hold everything in place firmly and keeps the installation clean and efficient. I’ve found that using these techniques not only secures the system but also makes the process much smoother.
Patch Back the Wall with Cement Plaster and Touch Up
When installing mini split lines inside a wall, it’s important to measure the length accurately to ensure they won’t protrude. Before you start, check that the lines are the correct and appropriate size. After placing the mini split lines, you need to confirm there is sufficient room to patch back the wall without any issues.
Use cement plaster to cover the area and then touch up with paint afterward to blend it in. Make sure to use the right resources for plastering to see a smooth finish that won’t crack once done.
Run the Refrigerant Lines and Wires to the Mini Split Outdoor Unit
When installing a mini split system, it’s crucial to carefully run the refrigerant lines and cables to the outdoor unit. Strategically cutting the wall helps conceal these wires and lines. The process may need to be repeated to ensure a clean and effective installation.
Conduct a Pressure and Megger Test Before Connecting the Mini Split
Before connecting a mini split to the indoor and outdoor units, it’s important to check everything to avoid potential issues. Conduct a pressure test on the refrigerant lines to ensure there are no leaks, which is essential for efficient operation. Additionally, using a megger to test the wires can prevent electrical problems.
Once these steps are completed, connect the lines properly and power up the system to test accordingly. This will help guarantee your mini split works efficiently without any problems.
Tools and Material Needed for Mini Split Lines in Walls
Following are the tools mentioned and needed for the above procedure.
- Hand Grinding Machine – Use it to cut walls.
- Copper Tube Bender Spring – Use it to bend the refrigerant lines.
- PVC Drain Pipe – Use it for concealed applications.
- PVC Conduit – Use it to protect PVC cables.
- Dry Wall Repair Kit – Use it to patch back the wall.
- Black Tape – Use it to hold the lines together.
Other Ways to Hide Mini Split Lines
If hiding mini split lines within walls feels too challenging or expensive, there are alternative methods to conceal them.
Concealed in Between Wall Studs
By placing the pipes between wall studs, you can seamlessly integrate the system into the structure, avoiding visible pipes and maintaining a clean look. The installation method involves concealing the lines behind dry walls, with a focus on adding an insulation layer around them to enhance efficiency. This approach is particularly applicable in scenarios where aesthetics and functionality are key.
Concealed Above the Ceiling
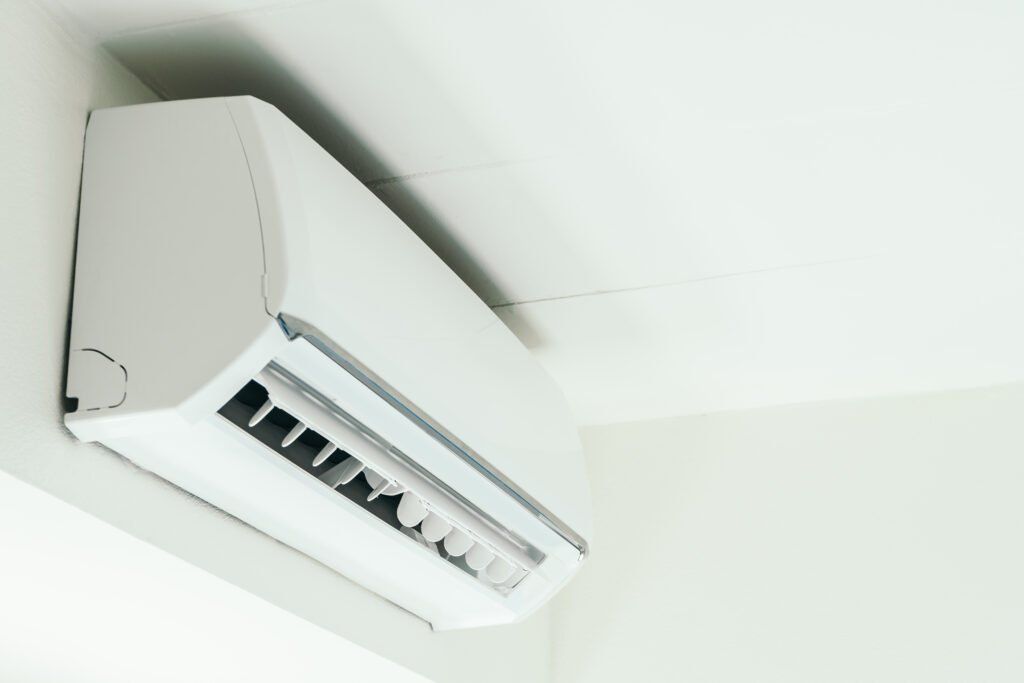
Many homeowners might wonder if the lines can be hidden from view. If you choose a ceiling cassette unit or a ceiling ducted unit, the refrigerant lines, drain line, and wires can be perfectly concealed above the ceiling, giving your space a clean and sleek look.
However, for wall-mounted units, these lines often remain visible unless you take the extra step to conceal them within the wall. This may require a condensate pump for proper drainage. If you’re thinking about making this upgrade, I’ve shared detailed insights on the use of a condensate pump in one of my articles, which might be helpful.
Possible Disadvantages
Running mini split lines inside walls can present some challenges. The initial installation might have a higher cost, especially if replacement installations become necessary. Replacing pipes means they must be stripped from the wall, possibly damaging wallpaper that will need to be redone afterward.
If issues like leaky drain pipes or condensation occur, they might not be easily identified until significant damage is discovered. This could cause the unit to cease functioning, clearly indicating something is wrong.
Additionally, air conditioning output and pipe sizes differ based on room size and air conditioner manufacturer, making it essential to consider these differences. Underground line-sets face poorer conditions due to temperature, moisture, and lack of ventilation, which can affect the long run savings and comfort of your system. Using an experienced contractor who takes extra caution is critical to avoid these potential issues.
Conclusion
When installing a mini-split system, placing the lines inside an interior wall is a common practice. However, there are crucial considerations to keep in mind. Ensuring comfort and durability in your indoor unit setup means prioritizing these factors. For a comfortable environment, it’s vital that the system is built to last. Seeking professional guidance and adhering to local building codes can assist in achieving a successful, functional installation that meets regulatory standards. The experts at ecobreezesolutions can help you navigate any obstacles and challenges in the process. Whether you prefer a call, chat, or email, they’re ready to support your journey to a ductless design that brings you peace of mind.
FAQs
Can mini split lines run through an attic?
Yes, mini-splits can have their lines run through attics. If your attic space is transformed into a usable space, like a top-floor room, you can install a mini-split and run the lines through the attic, keeping your walls clean and the system efficient.
Do mini splits devalue a house?
Mini splits don’t devalue a house; they can actually increase property value. These modern, efficient heating and cooling solutions are especially attractive in older homes or additions where traditional ductwork is impractical or impossible to install.
Can mini split lines be run inside?
Mini split systems offer flexibility and convenience for regulated climate control, with straightforward installation on either interior or exterior walls, preserving your home’s aesthetics and ensuring total comfort.